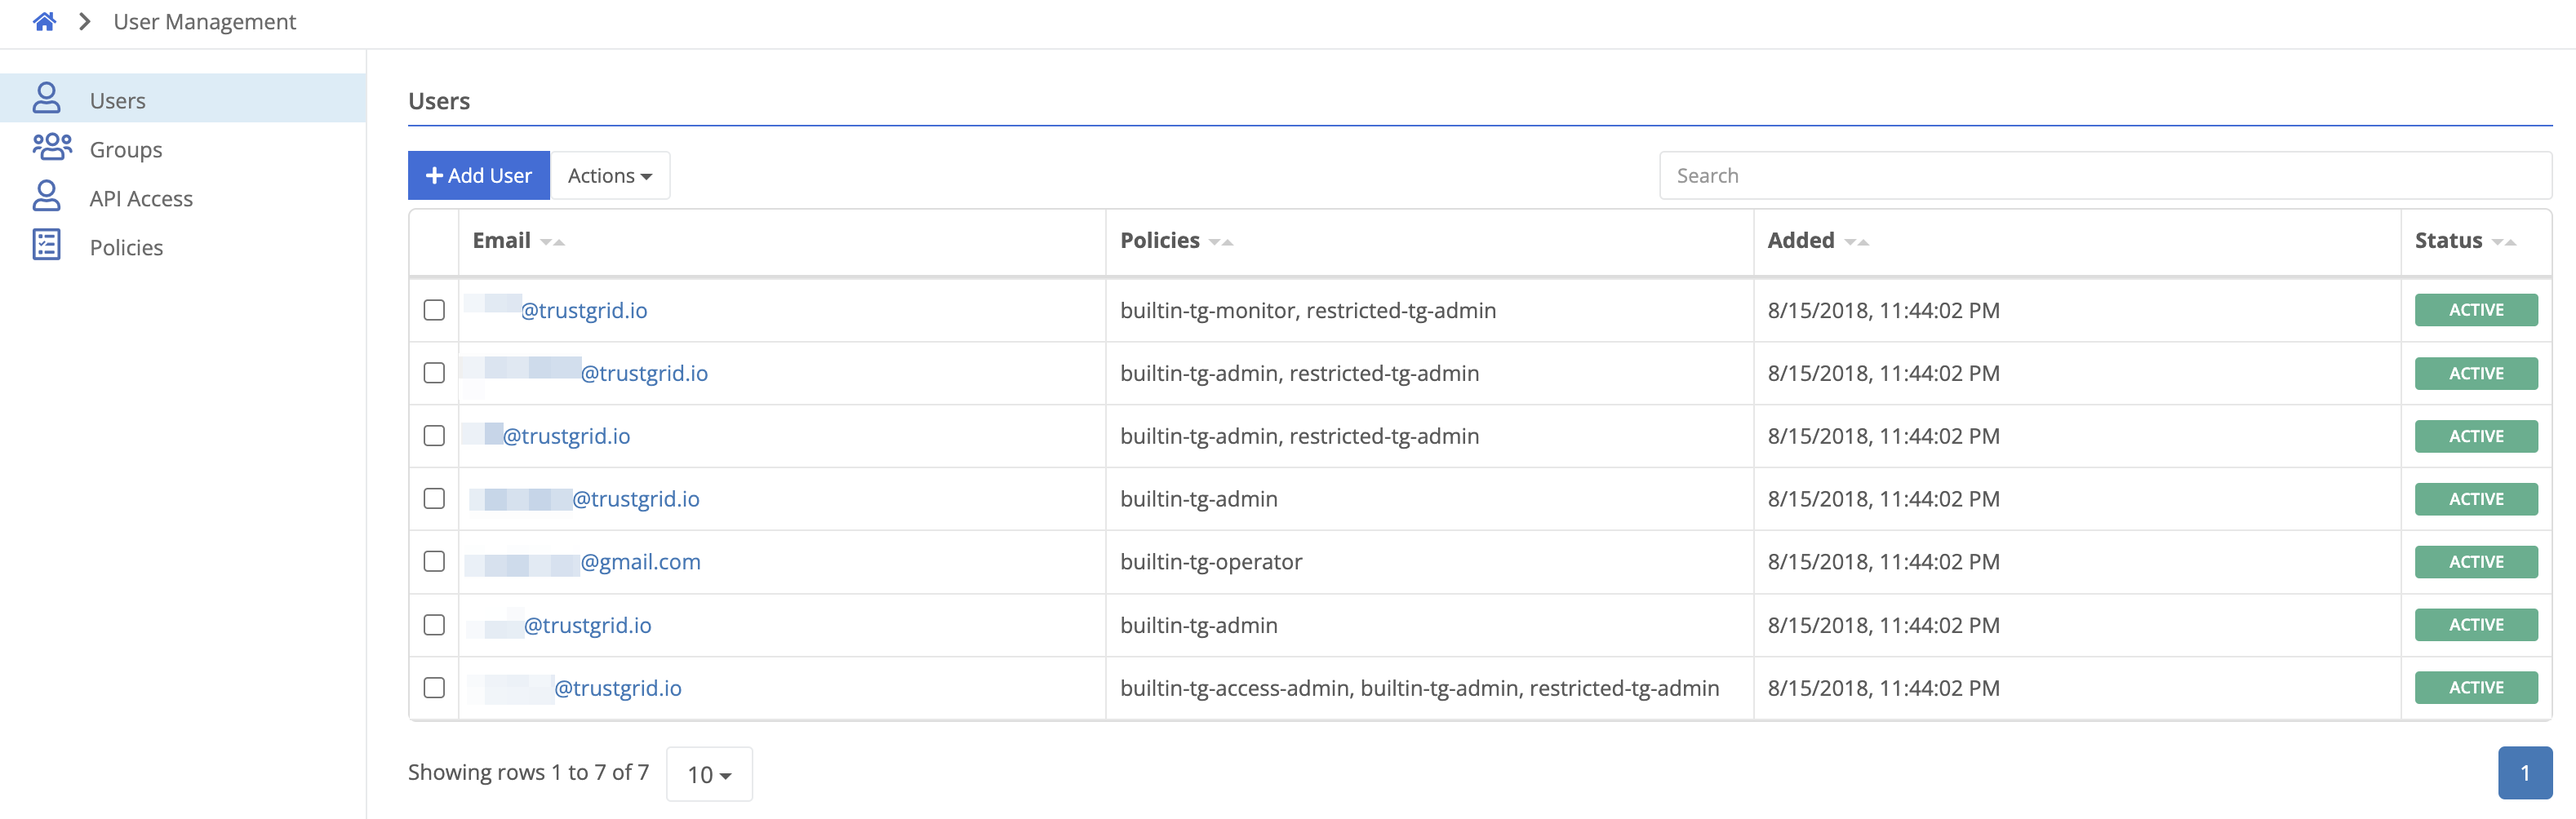
The Users panel is the primary panel for managing user identities and the policies attached to them. All changes in this panel require either the builtin-tg-acess-admin policy or similar permissions.
Adding or Inviting Users
Users can either be invited to the Trustgrid portal and utilize Trustgrid’s native authentication system, or be added and be authenticated by a customer configured Identity Provider (IdP).
Inviting Users
For users that will utilize Trustgrid’s native authentication system, you will need to invite them with a valid email address.
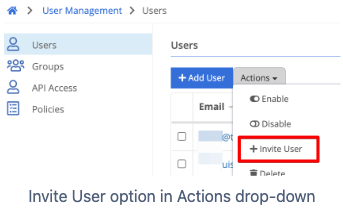
Navigate to User Management → Users
Under Actions select Invite UserInvite User action
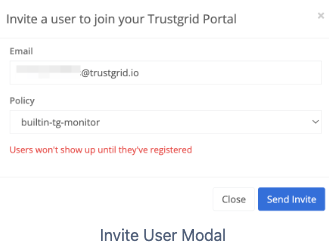
Enter the user’s valid email address and select the desired base policy (more can be attached later).
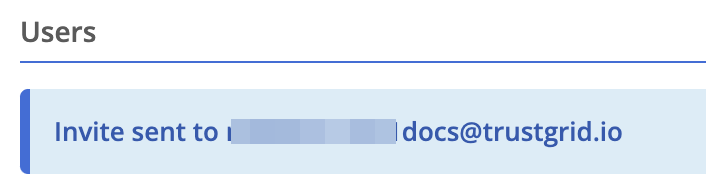
Click Send Invite. You should see a confirmation that the invite was sent like the one below.
The user will receive an email with a link to the Trustgrid Portal or similar. They will need to click said link.
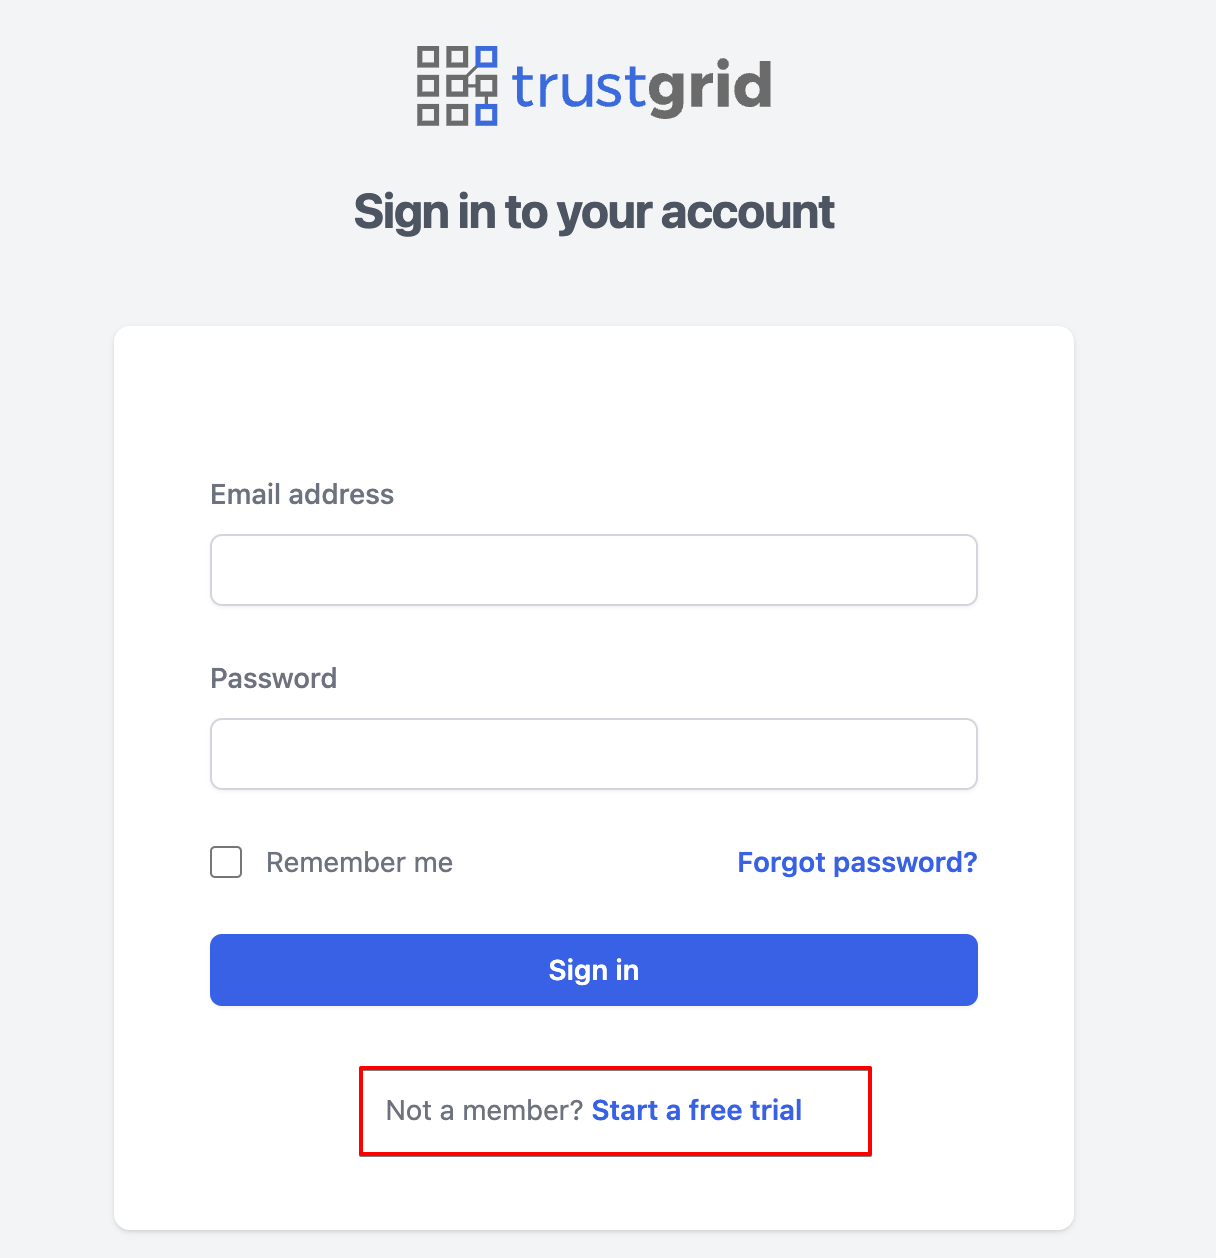
Once at the Portal, the user will need to click the Start a free trial option. The user must use the same email address that was invited to get access to your account.
Click Start a free trial
The user will be prompted for their email, name, password, and company. The user must use the same email address that was invited to get access to your account. Enter required information and click Sign Up
A verification email will then be sent to the invited user’s email address. They will need to click the link in the email to verify their email and complete registration.
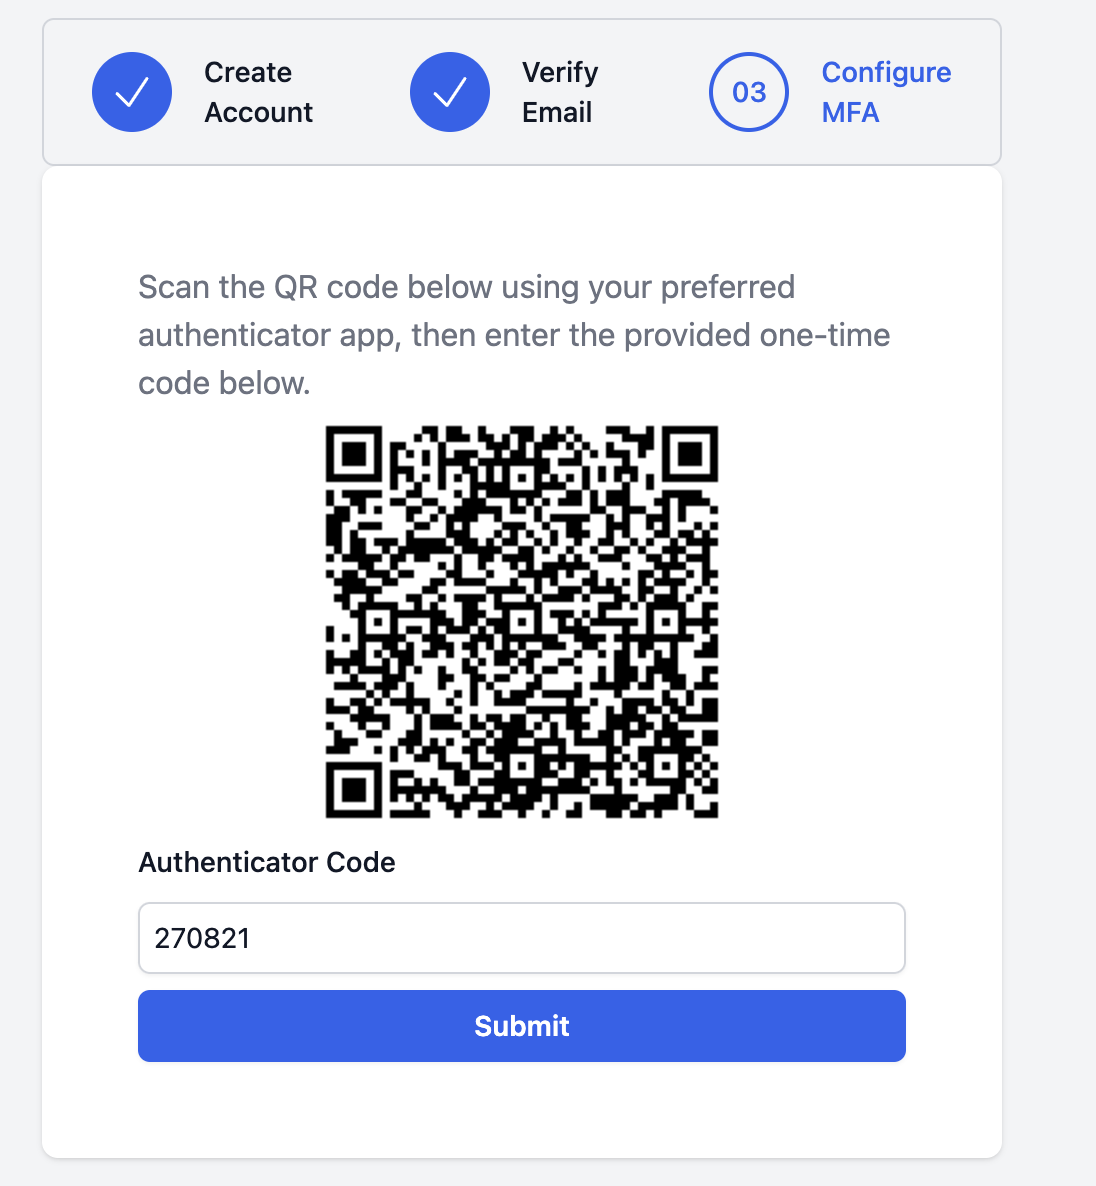
After verifying their email address the user will be prompted to configure Multi-Factor Authentication (MFA). Trustgrid recommends using a one-time password MFA such as Authy or Google Authenticator.
Scan the QR code with your app.
Enter the passcode and click the Submit button.
The user is returned to the login screen. Login with the newly created email, password, and MFA code. You will then be redirected back to the Trustgrid portal.
Adding Users (with Identity Providers)
If your account has an Identity Provider (IdP) configured as a Portal Auth Provider, you use the Add User button to create an identity for them within Trustgrid.
Some IdP’s allow for users to be synchronized automatically making this step unnecessary
Navigate to User Management → Users
Click the Add User button
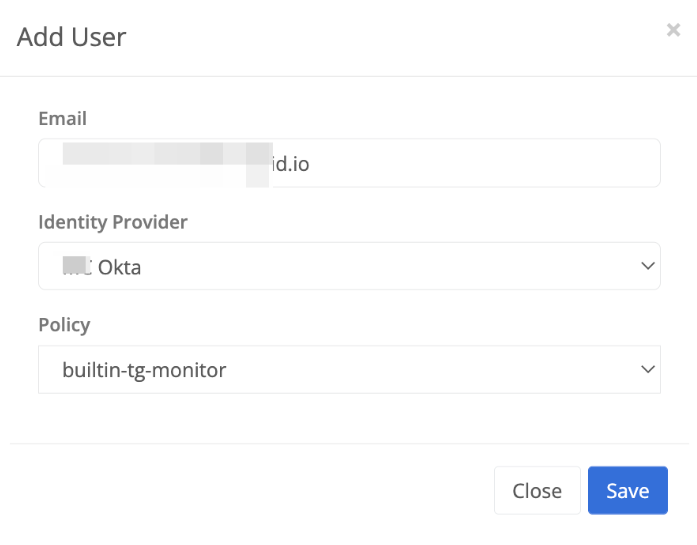
Enter in the user’s email address. This must be the same email address the IdP sends back to Trustgrid, if unsure consult with your IdP Admin.
Select your Identity Provider (if more than one)
Select the desired base policy. More can be attached later.
Click SaveAdd User Prompt
The user can then navigate to the portal authentication domain associated with the IdP. They will be redirected to the IdP page and required to enter their username, password and MFA (if configured), then automatically sent back to the Trustgrid portal.
Manage User Policies/Permissions
Attaching Policies
To attach/detach policies attached to a user:
Under User Management → Users search for the target user and click their name.
To add a new policy:
Click the Attach Policy button
Search for the desired policy then select it.
Click Attach
Removing Policies
To remove a policy from a user:
Under User Management → Users search for the target user and click their name.
Click Detach located to the right of policy you wish to remove.
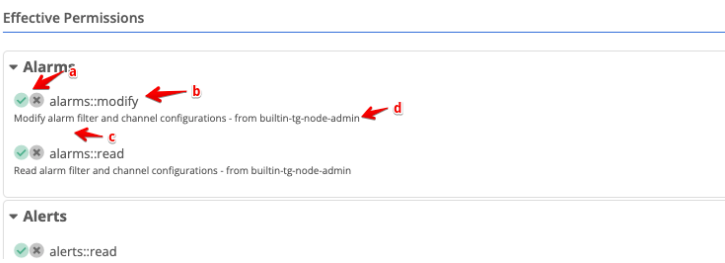
View Effective Permissions
To see what permissions a user currently has and what policy is providing that permission:
Under **User Management** → **Users** search for the target user and click their name.
In the right `Effective Permissions` pane, find the permission in question. These permissions are grouped by category. Each entry will show:
Example effective permissions
If the permission is allowed ✅, explicitly denied ❌, or not defined (both icons gray)
The action name
A short description of what the permission allows
what policy grants/denies the user the permission
Change a User Landing Page
The Landing Page allows you to designate where a user is directed within the portal on initial login.
This is most useful for users that only need access to ZTNA Remote Access application at the /apps page or if you want them to automatically land on a specific page like /nodes.
Under User Management → Users search for the target user and click their name.
Enter in the desired landing page path (e.g. /apps) and click SaveChange user landing page
Managing Group Membership
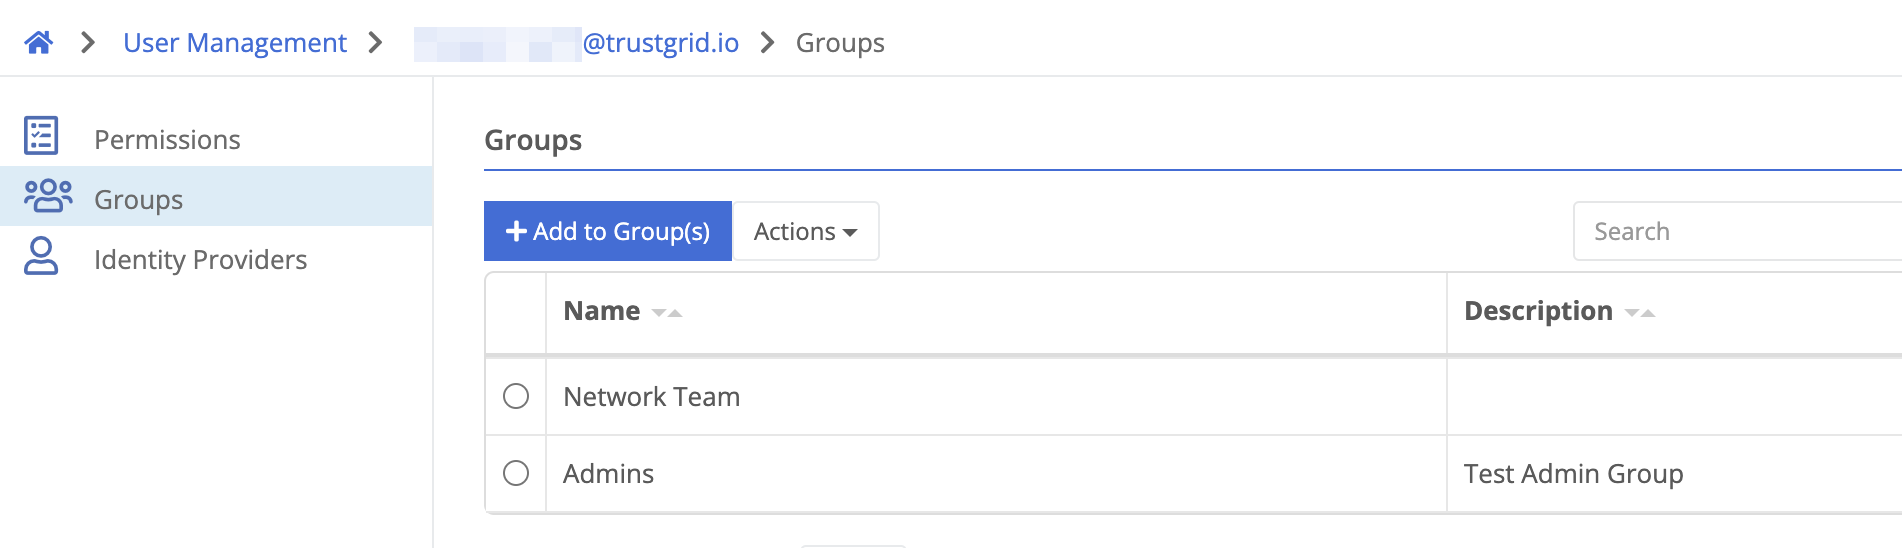
View a User’s Group Membership
You can view all the Groups a user is a member of from the Groups panel. To change memberships you will need to use the User Management → Groups page.
To view:
Under User Management → User search for the target user and click their name.
Select the Groups panel on the left.
Groups will be listed in a table in the main panel.
Example group membership table
Adding a User to Groups
You can add a user to one or more group by:
Navigate to User Management > Users and click on the name of the user to add to groups.
Select the Groups panel from the left navigation bar.
Click the “Add to Group(s)” button.
From the prompt select the group or groups you want to add the user to. If there are many groups you can start typing the name to filter the options.
Add Groups prompt
Click Save
Removing a User from Groups
You can remove a user from a group by:
Select the radio checkbox next to the group you wish to remove.
From Actions, select Delete.
Deleting a group membership
When prompted confirm you want to delete the user.
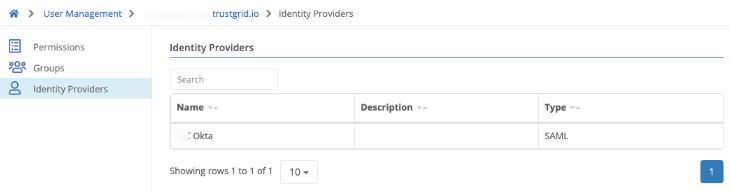
View a User’s Associated Identity Provider (IdP)
If an Identity Provider is configured a user maybe associated with one or more IdP. To view:
Under User Management → Users search for the target user and click their name.
Select the Identity Provider panel on the left.
The identity Providers will be listed in a table in the main panel. If no IdP is listed this indicates the user is using the Trustgrid native authentication system.
Example User Identity Provider table