Deploying Ubuntu VMs
Details methods for deploying Ubuntu instances required for the trial steps
6 minute read
In this section, we will cover the initial setup of two Trustgrid agents on separate Ubuntu hosts to demonstrate communication across a Trustgrid virtual network. Examples where this could be useful in the real world include:
sudo privileges to install additional repositories and packages.To facilitate a smooth trial, a default virtual network is created. This network uses the carrier-grade NAT address space 100.64.0.0/10 as an IP Pool. Agents are automatically assigned an IP address from this pool when they are attached to the virtual network and routes are automatically created to allow communication between agents on the same virtual network.
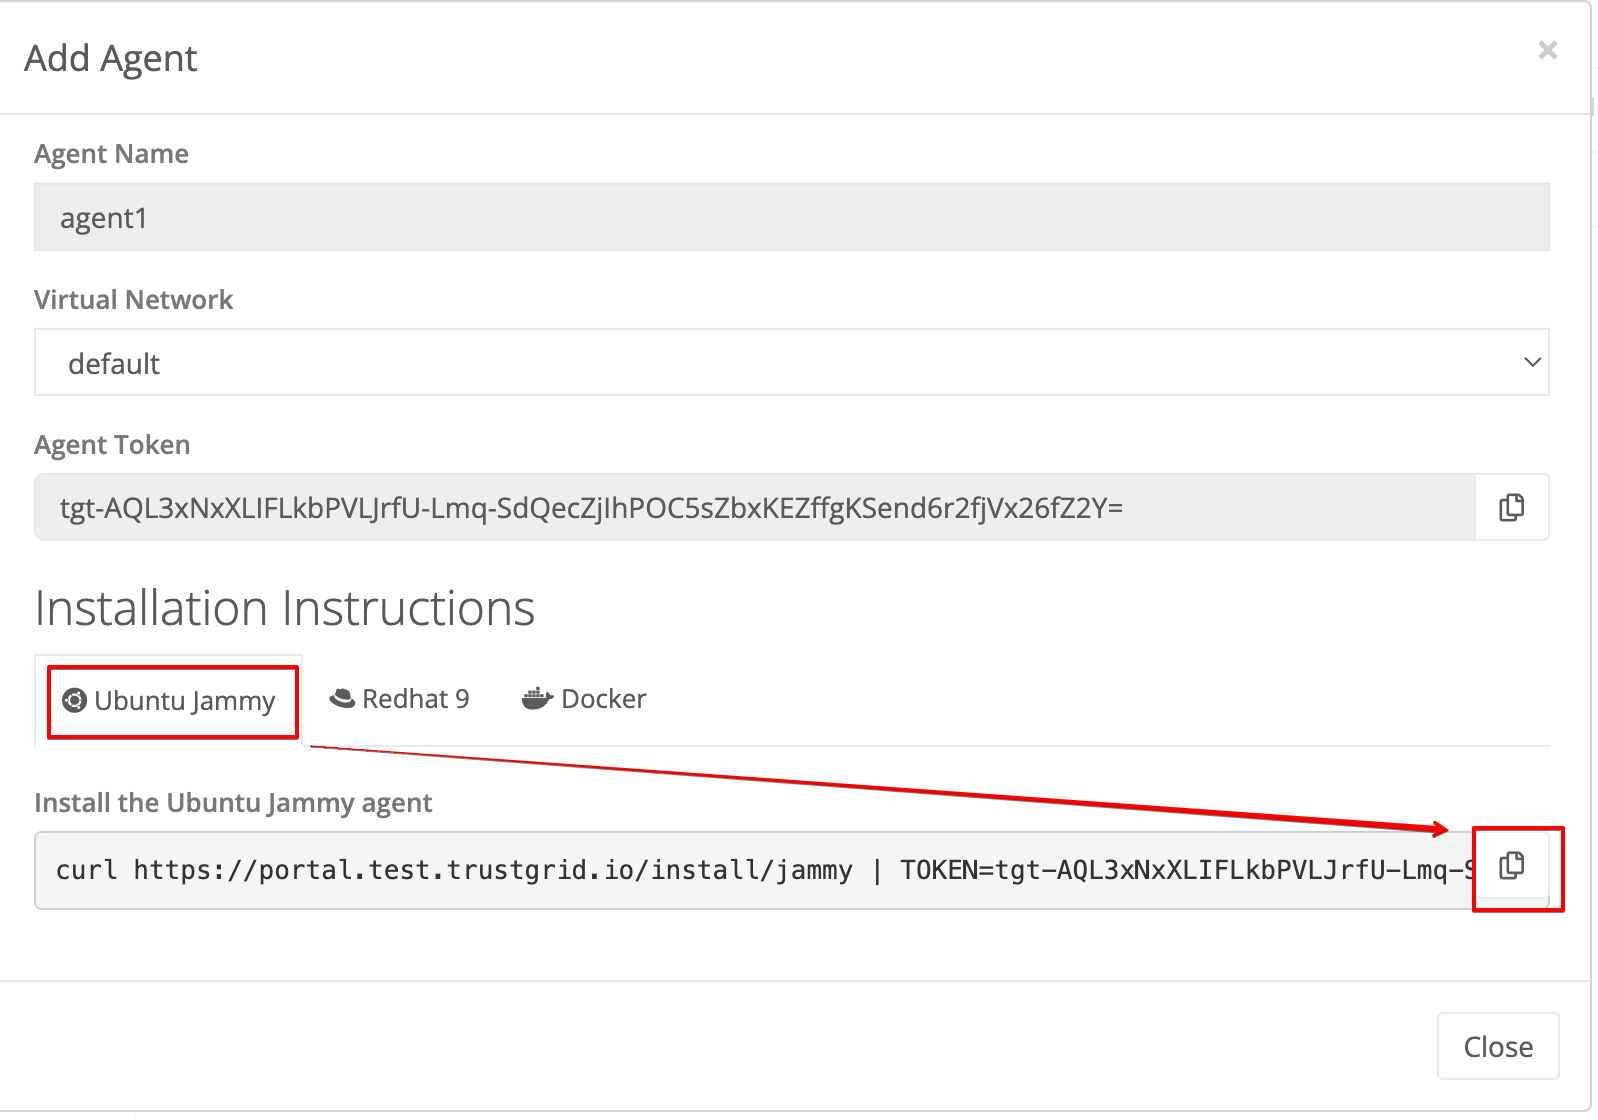
From the Nodes table, click the + Add Agent button to generate an agent token.

When prompted provide a name and choose the Virtual Network the agent will connect to. Then click Add.

Make sure the “Ubuntu Jammy” tab is selected and then click the copy button to copy the install command to your clipboard.
Login to your Ubuntu instances as a user with sudo permissions.
Paste the command from your clipboard and hit enter. The install process will run automatically.
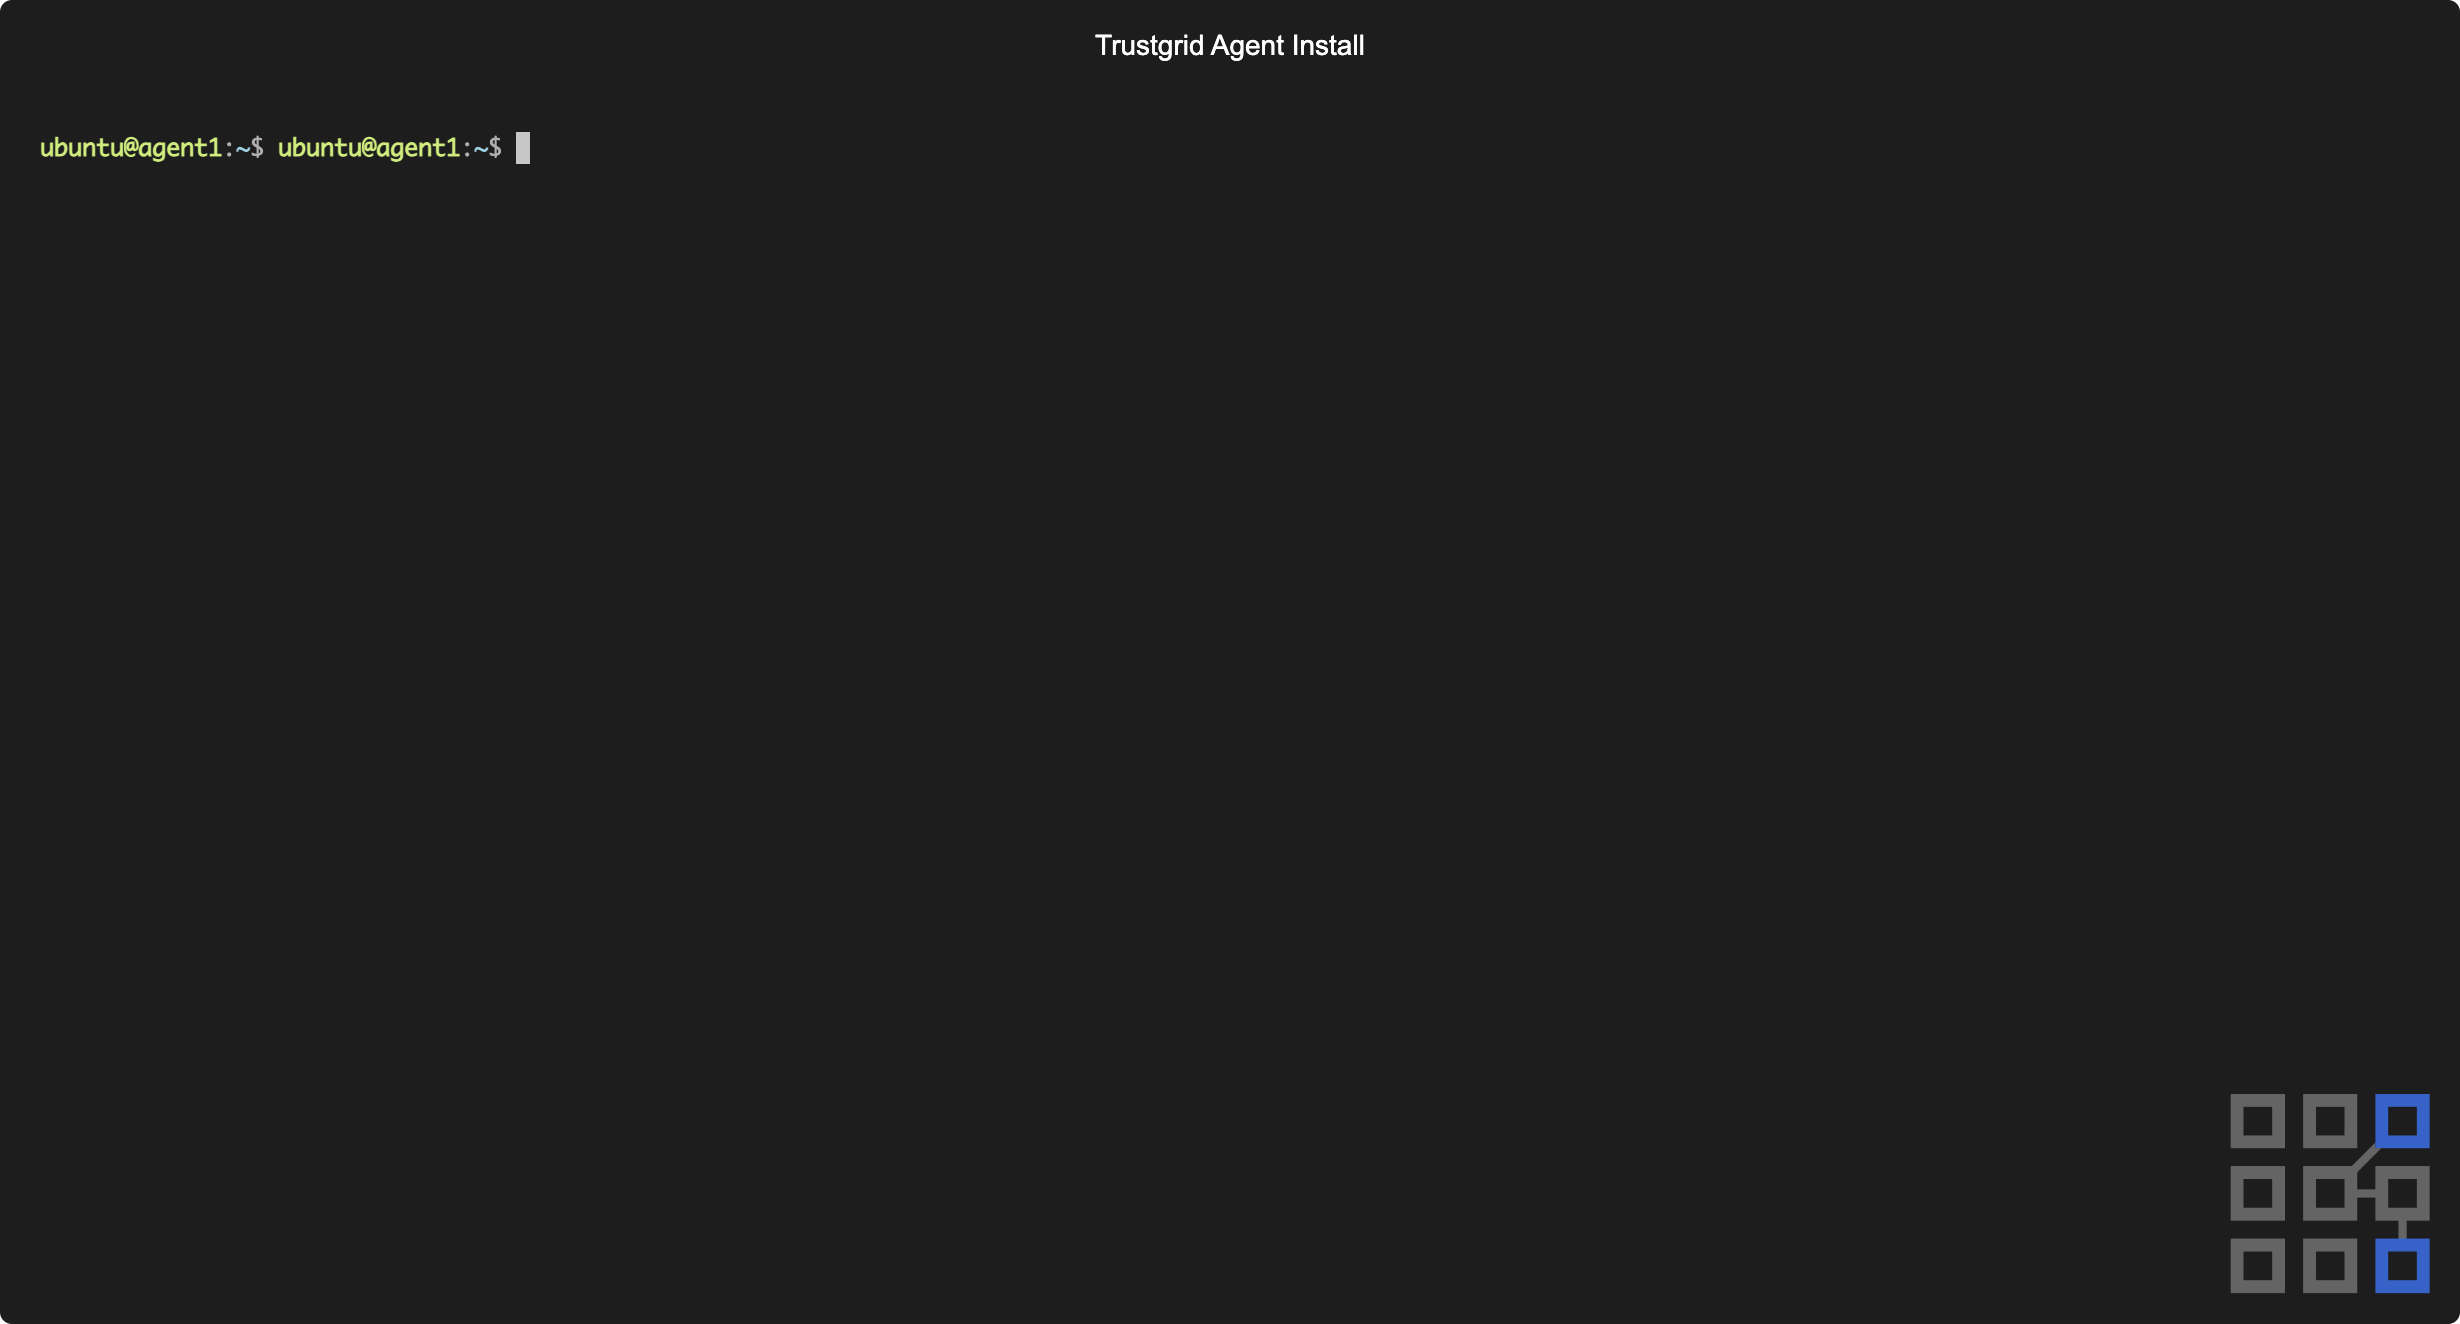
After it completes you can return to the portal and close the Add Agent panel. You should see the new agent listed in the Nodes table and online.

Follow the process below to run the agent in a Docker container:
Without any elevated privileges, Docker agents can demonstrate connectivity and direct layer 4 traffic. To allow the Docker agent to route IP pool traffic from the host machine, the container requires host networking and NET_ADMIN and NET_RAW capabilities. Add these flags to the Docker command:
-v /dev/net/tun:/dev/net/tun --network=host --cap-add=NET_ADMIN --cap-add=NET_RAW
To persist logs and configuration locally, volumes can be attached to the container. The configuration files are stored in /var/lib/trustgrid/agent, and logs are stored in /var/log/trustgrid/agent. To attach volumes for those directories, append to the Docker command given:
-v /path/to/local/config/volume:/var/lib/trustgrid/agent -v /path/to/local/log/volume:/var/log/trustgrid/agent
An example command with all flags and volumes attached would look like this:
docker run \
-e AUTH_TOKEN=tgt-... \
-v /path/to/local/config/volume:/var/lib/trustgrid/agent \
-v /path/to/local/log/volume:/var/log/trustgrid/agent \
-v /dev/net/tun:/dev/net/tun \
--network=host \
--cap-add=NET_ADMIN \
--cap-add=NET_RAW \
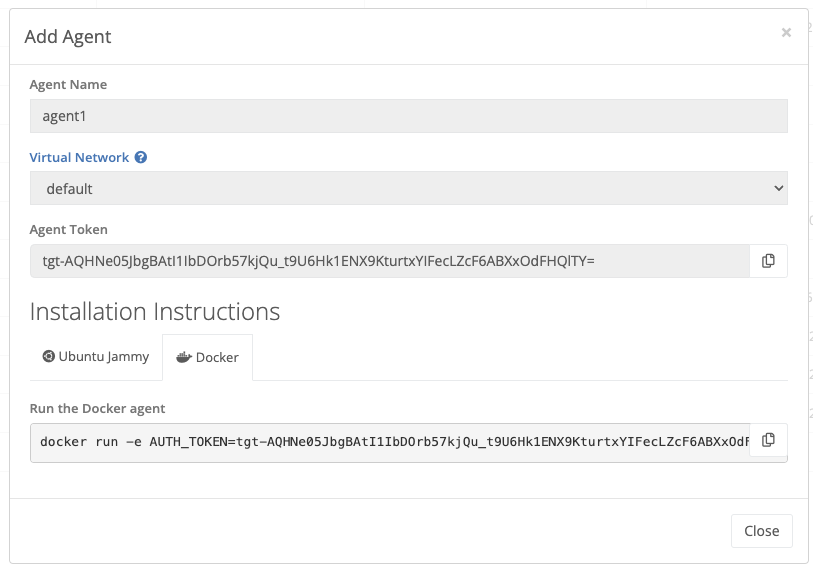
trustgrid/agentFrom the Nodes table, click the + Add Agent button to generate an agent token.
When prompted provide a name and choose the Virtual Network the agent will connect to. Then click Add.
Make sure the “Docker” tab is selected and then click the copy button to copy the install command to your clipboard.
Login to your Docker host as a user with permissions to run containers.
Paste the command from your clipboard and hit enter. The container image will download from Dockerhub and will start automatically.
After it completes you can return to the portal and close the Add Agent panel. You should see the new agent listed in the Nodes table and online.
As part of registration, each agent is automatically assigned an IP address on the Trustgrid virtual network. We will need this IP address to confirm communication between the agents in later steps.
ip address show dev trustgrid0
Repeat the above steps on the second Ubuntu instance to install the Trustgrid agent with a name like “agent2” on the same Virtual Network and determine agent2’s IP address
This should return a different IP address in the same network.

From agent2 run the below command to ping agent1 using its Trustgrid IP address:
ping -c 4 100.64.0.1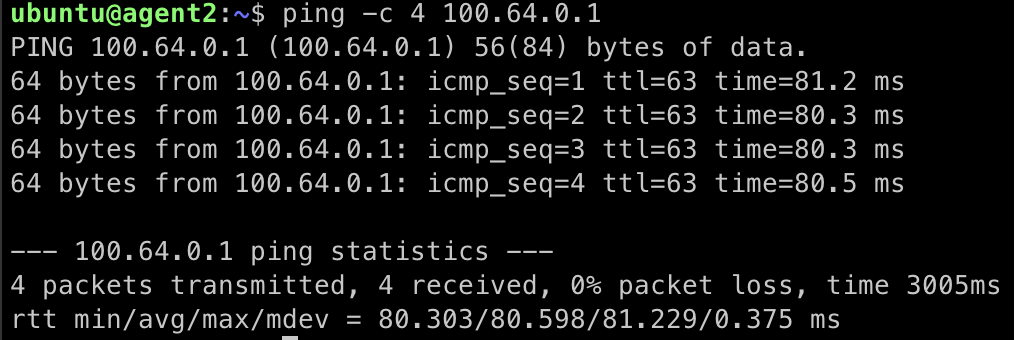
Similarly, from the console of agent1 run the below command to ping agent2:
ping -c 4 100.64.0.2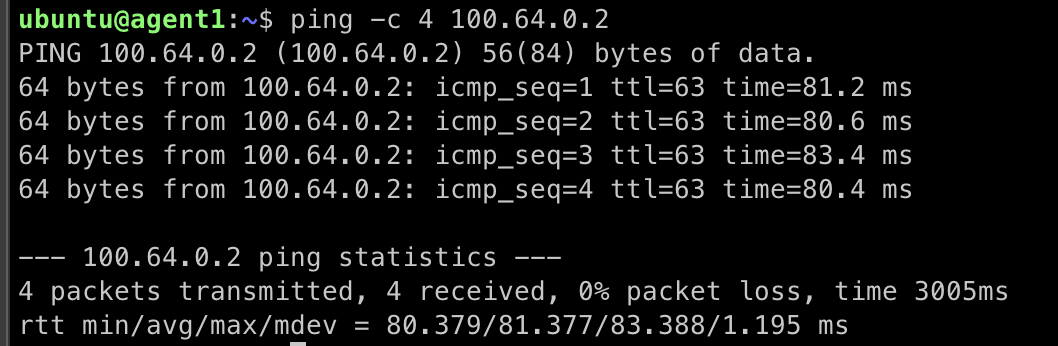
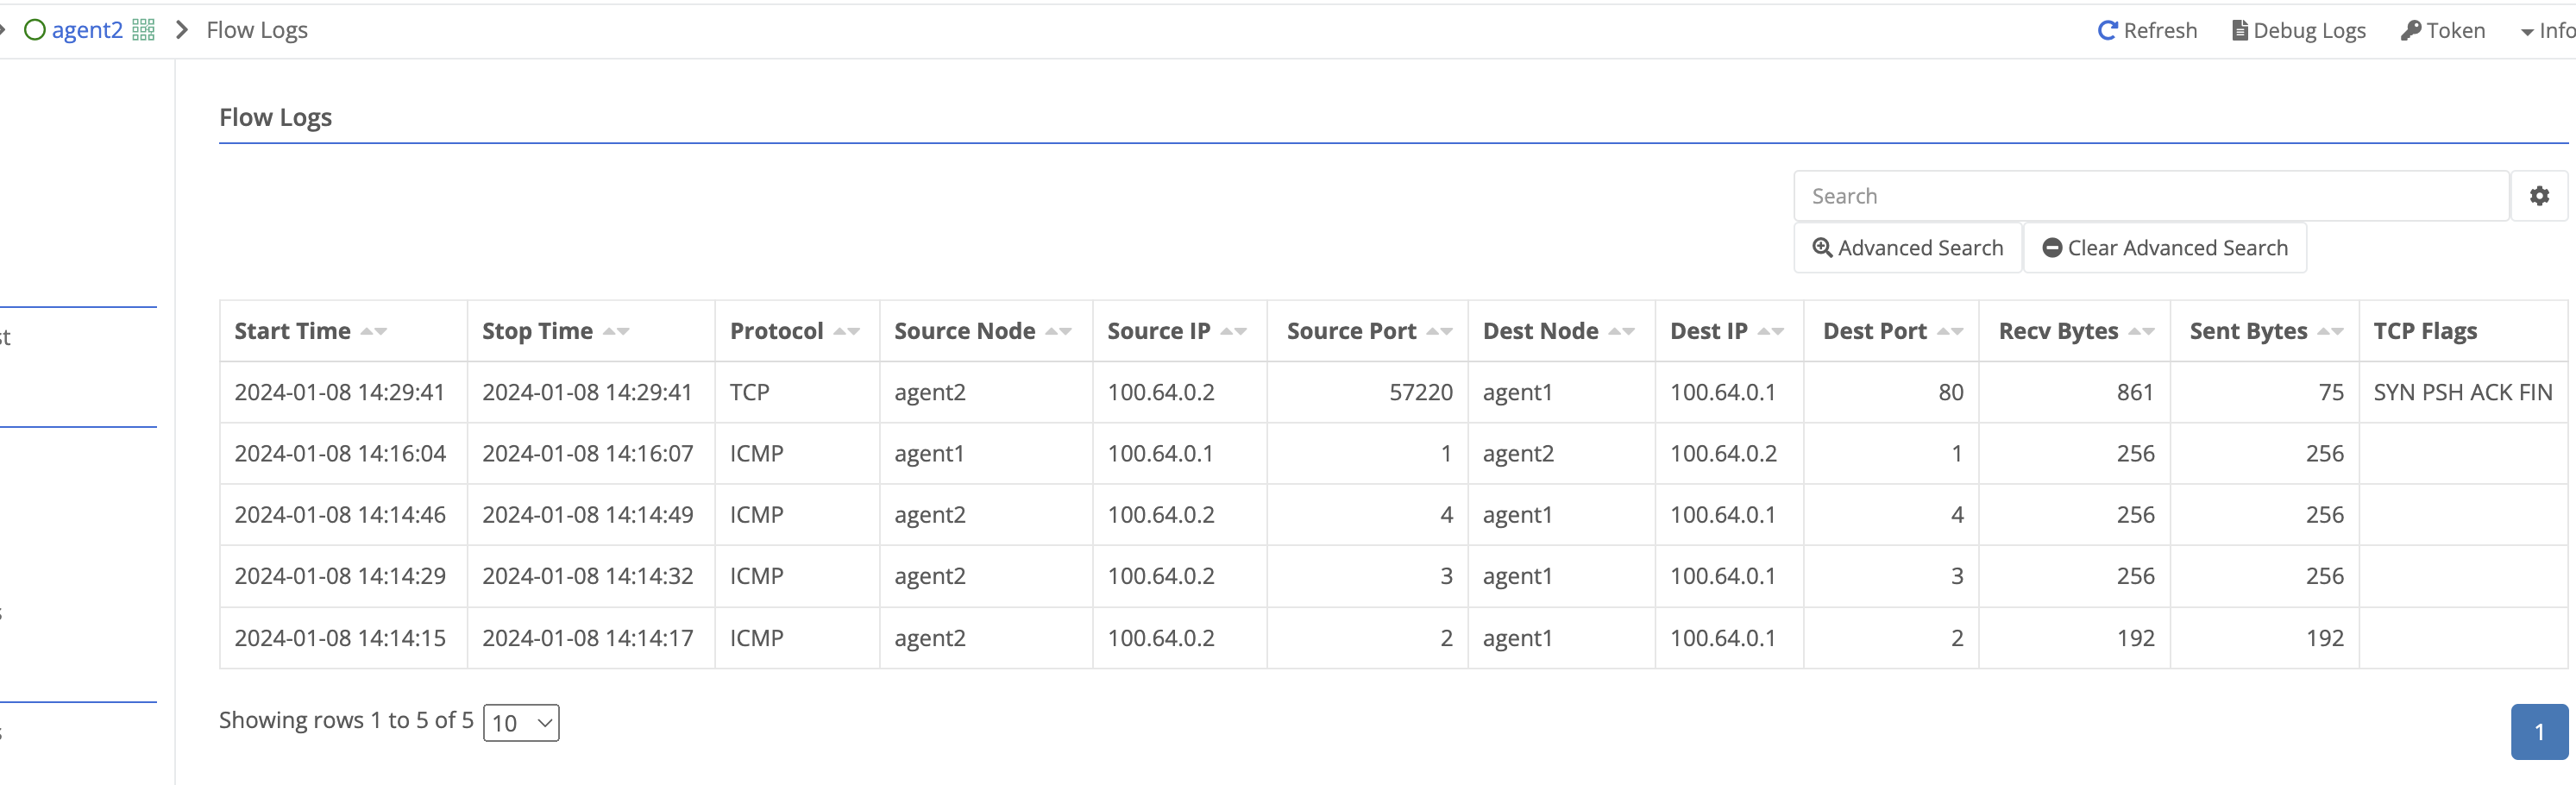
Flow logs provide visibility Trustgrid provides into the traffic passing through agents. They show details of every connection including source, destination, protocols, and more.
The flow logs for agents are shown on the Overview page for each node beneath the stats.

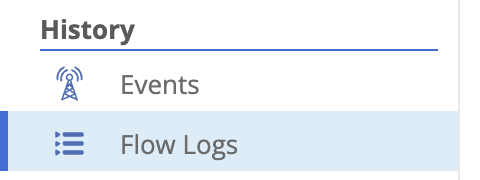
Additionally, the flow logs table is available under History > Flow Logs.
This table includes the ability to perform advanced searches and export the flow logs to csv.
In the below screenshot, the TCP flow log from the generated web traffic steps is visible including TCP flags. TCP Flags can be very useful in troubleshooting failed connections in the past. If only the SYN flag is shown this indicates the destination ip:port did not respond to complete the TCP handshake.
Now that you have the basic agent setup complete and have seen traffic passing between the agents you can proceed to test using Access Policies to control what traffic is allowed on the network.
Details methods for deploying Ubuntu instances required for the trial steps
Was this page helpful?
Glad to hear it! Please tell us how we can improve.
Sorry to hear that. Please tell us how we can improve.