Azure Route Failover
5 minute read
How it works
Trustgrid provides the ability for a cluster of Azure based appliances to published routes to one or more Azure route table. When failover occurs, the Trustgrid appliance will automatically update the next hop IP address in the route table to the active appliance in the cluster.
Graceful Failover
This describes the process of a graceful failover when the active member of the node is changed but both members are online and working normally.
- The Trustgrid appliance that is relinquishing the active role will remove the Azure Route Table Entry(ies) from the route table(s).
- The Trustgrid appliance that is gaining the active role will create a new Azure Route Table Entry(ies) and associate it with the route table(s).
Ungraceful Failover
This describes the process of an ungraceful failover when cluster health conditions prevent the active member of the node from functioning.
- After the specified Cluster Timeout period has elapsed the Trustgrid appliance that is taking the active role will remove the Azure Route Table Entry(ies) from the route table(s).
- The now active Trustgrid appliance will create a new Azure Route Table Entry and associate its own interface IP.
Requirements for HA Route Failover
- One or more route tables. By default, the node attempts to use the route table associated with the subnet of the interface where the Azure Route Table Entry is defined.
- Trustgrid Nodes need Azure permissions to modify route tables
Azure Routing Table
An Azure routing table resource needs to be associated with the LAN interface’s subnet.
View LAN Subnet Routing Table
- In the Azure Portal search for Virtual Networks and select the service
- From the list of Virtual Networks select your target Virtual Network
- From the navigation panel select Subnets
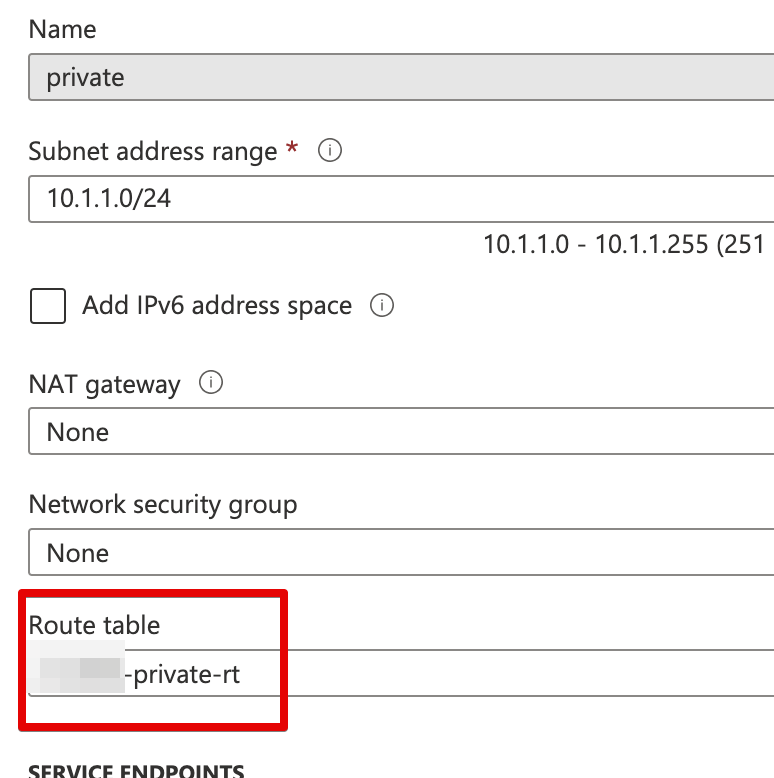
- Select your inside/private subnet that is attached to the LAN interface of your Trustgrid VMs
- There should be a route table
Create Route Table for LAN Subnet
- If there is no Route Table associated with your LAN/inside/private subnet you will need to add it.
- In the Azure portal search for Route Tables and select the service
- Click the +Create button
- Select the Resource Group that contains your Virtual Network and VMs
- Select the Region that your VMs are deployed in
- Give the Route Table a name consistent with your naming conventions
- (Optional) change the Propagate Gateway routes option.
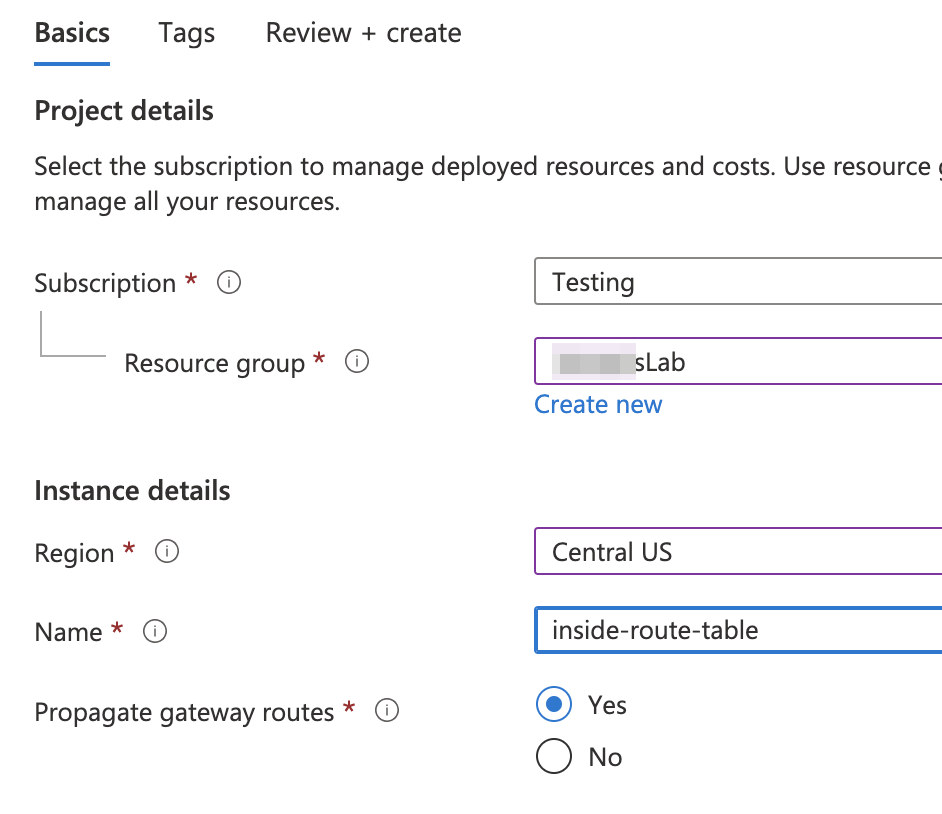
- Click Review + Create, review then click Review + Create again
- Repeat the above steps to “View LAN Subnet Routing Table” and change the route table from None to the newly created Route Table.
- Save the change
Permissions Required for Cluster Route Failover
Copy this sample json file for use in creating a custom role with the required permissions. See process below.
The assignableScopes section will need to be modified to represent the subscription or resource group where the Trustgrid appliances and any route tables they will modify reside.
{
    "properties": {
        "roleName": "tg-route-table",
        "description": "manage azure route table",
        "assignableScopes": [
        ],
        "permissions": [
            {
                "actions": [
                    "Microsoft.Network/networkWatchers/nextHop/action",
                    "Microsoft.Network/networkInterfaces/effectiveRouteTable/action",
                    "Microsoft.Network/routeTables/routes/delete",
                    "Microsoft.Network/routeTables/routes/write",
                    "Microsoft.Network/routeTables/routes/read",
                    "Microsoft.Network/routeTables/join/action",
                    "Microsoft.Network/routeTables/delete",
                    "Microsoft.Network/routeTables/write",
                    "Microsoft.Network/routeTables/read",
                    "Microsoft.Network/networkInterfaces/read",
                    "Microsoft.Network/virtualNetworks/read",
                    "Microsoft.Compute/virtualMachines/read"
                ],
                "notActions": [],
                "dataActions": [],
                "notDataActions": []
            }
        ]
    }
}
Create and Assign Custom Role via Azure Portal
A custom role needs to be created in the Azure subscription that allows the Trustgrid nodes to update the route table when failover occurs
Create the custom role
- In the Azure portal search for “Subscriptions” and select the Subscriptions service
- Select the subscription that contains the Trustgrid VMs
- Select “Access control (IAM),” then click “+Add”, then “Add custom role”

- Save the JSON above to a file named
azure-custom-role-sample.json. - Select “Start from JSON” and from the file selector, select the downloaded json file.

- Optionally, update the role name to meet your internal naming conventions.
- Click Next.
- On the Permissions page you will see the permissions that will be granted. Click Next again.
- On the Assignable Scopes page click +Add Assignable Scope
- From the Type select Resource Group
- From the Subscription, select the subscription containing your VMs and virtual networks.
- From the Select pane on the right search for and select the Resource Group containing you VM’s

- Click Select and then Next.
- Repeat for any other resource groups that contain route tables that will be modified by the Trustgrid nodes. Alternatively, you can set the assignable scopes to the entire subscription(s) that container the VMs and route tables.
- On the JSON page, click the Next button.
- Click Review + Create, then click Create.
Assign the custom role to your Trustgrid VM’s system-assigned
- In the Azure portal search for Resource Groups and select the service
- Select your target Resource Group (start with the group containing your Trustgrid VMs)
- Select the Access Control (IAM) panel, then click +Add, then “Add role assignment”

- Search for and select the desired role and click Next

- Under “Assign access to” select “Managed Identity” then click +Select members

- From the Managed Identity dropdown select Virtual Machine
- Select the identity for your first Trustgrid VM

- Click select.
- Click +Select members again and repeat with your second Trustgrid VM
- Click “Review + Assign” then “Review + Assign” a second time
- Repeat the above steps for any other resource groups that contain route tables that will be modified by the Trustgrid nodes.
Feedback
Was this page helpful?
Glad to hear it! Please tell us how we can improve.
Sorry to hear that. Please tell us how we can improve.