Remote Console Registration
5 minute read
Overview
The remote console registration process allows for a Trustgrid Node running a generic image to be registered with a valid Trustgrid account.
Requirements
- Console access to the Trustgrid Node. This could be achieved via:
- For physical devices either keyboard and monitor connections or serial console
- For VMware or Hyper-V remote console access
- For Azure and AWS serial console access via each providers management portal
- Portal access with the appropriate permissions to activate nodes.
Note: It is not necessary for a single person to have both console and portal access. This would allows a Trustgrid customer to ship their clients a generically imaged device or access to a virtual machine image.
Once the node is deployed with the required network access the Trustgrid customer can work together with their client to complete the activation process.
High-Level Process
- The user with console access to a Trustgrid node logs in:
- If necessary they can configure a static IP address from the console.
- They then initiate the registration process. This triggers a process that generates unique certificates for the node, upgrades to the latest version, and generates a short activation code. The node will then begin checking with the Trustgrid control plane to see if it has been activated.
- This code can then be shared with a user with access to the Trustgrid portal. That user can then enter the code in the Trustgrid portal via the Activate Node action. After entering the code they are prompted to provide a name for the node and click License Node.
- When the node detects its code has been activated it finalizes registration and then reboots. The node is then available for use and configuration.
Registering a Node
Generating Activation Code from Console
- Gain console access
- Login as tgadmin
- (Optional) Use the Network Configuration Option to change the IP. Default is to use DHCP.
- Select the Register Node action from the main menu.
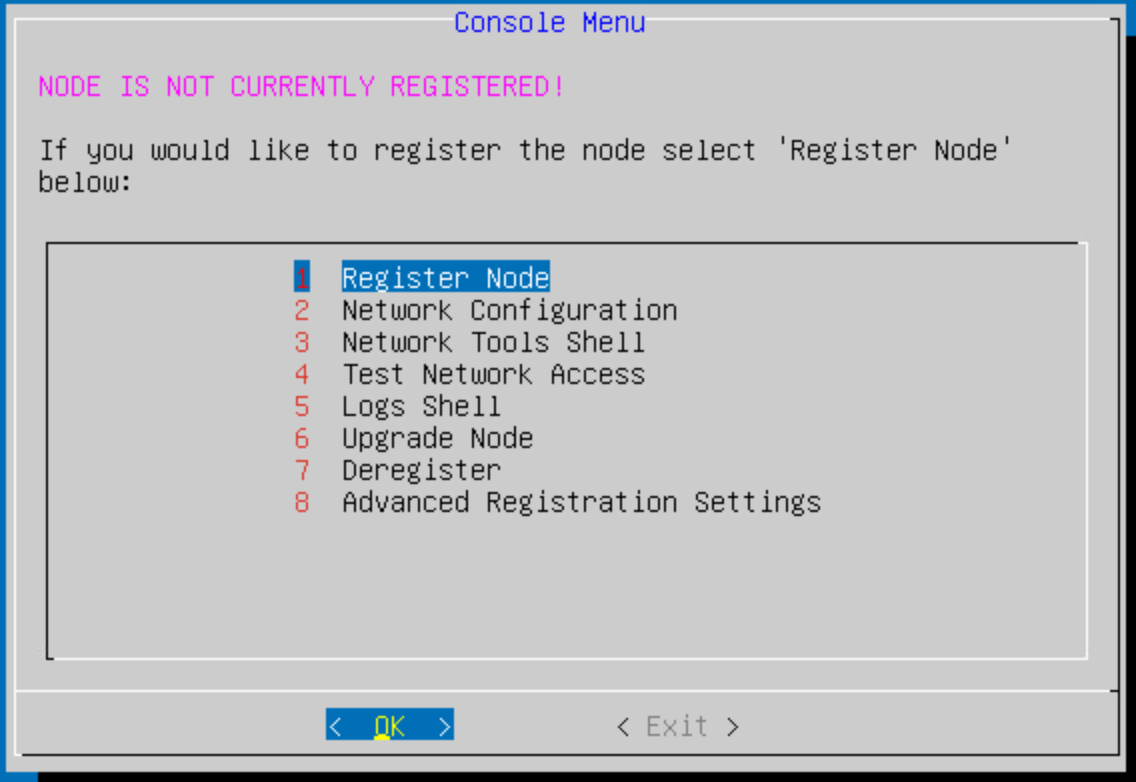
Remote Registration Menu option - You will be prompted to confirm the make and model of the node and the correct control plane endpoints to register with. These should default to the correct settings for your model, if not work with Trustgrid Support.
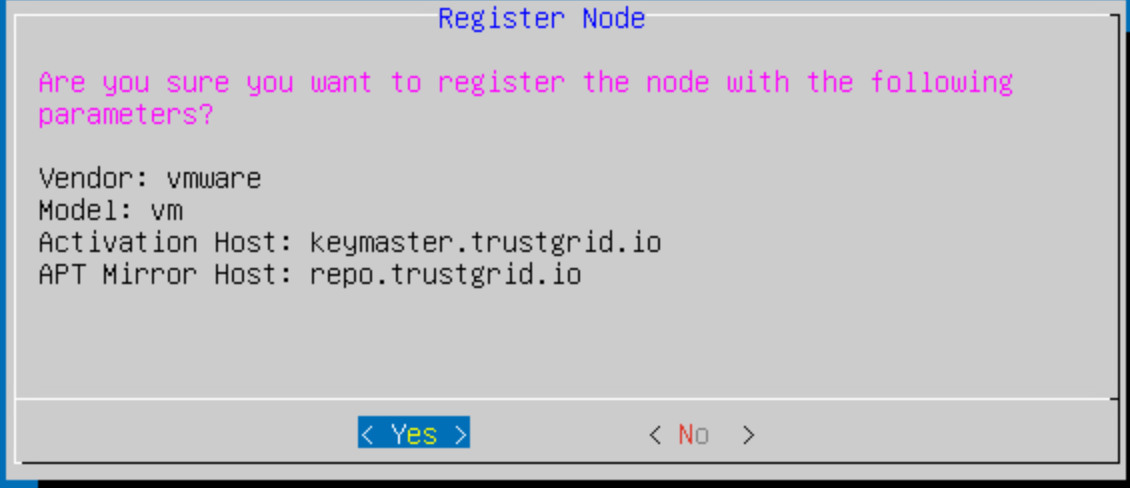
Confirm Options - The node will then generate a unique activation code. This code can be shared with a user with access to the Trustgrid portal.
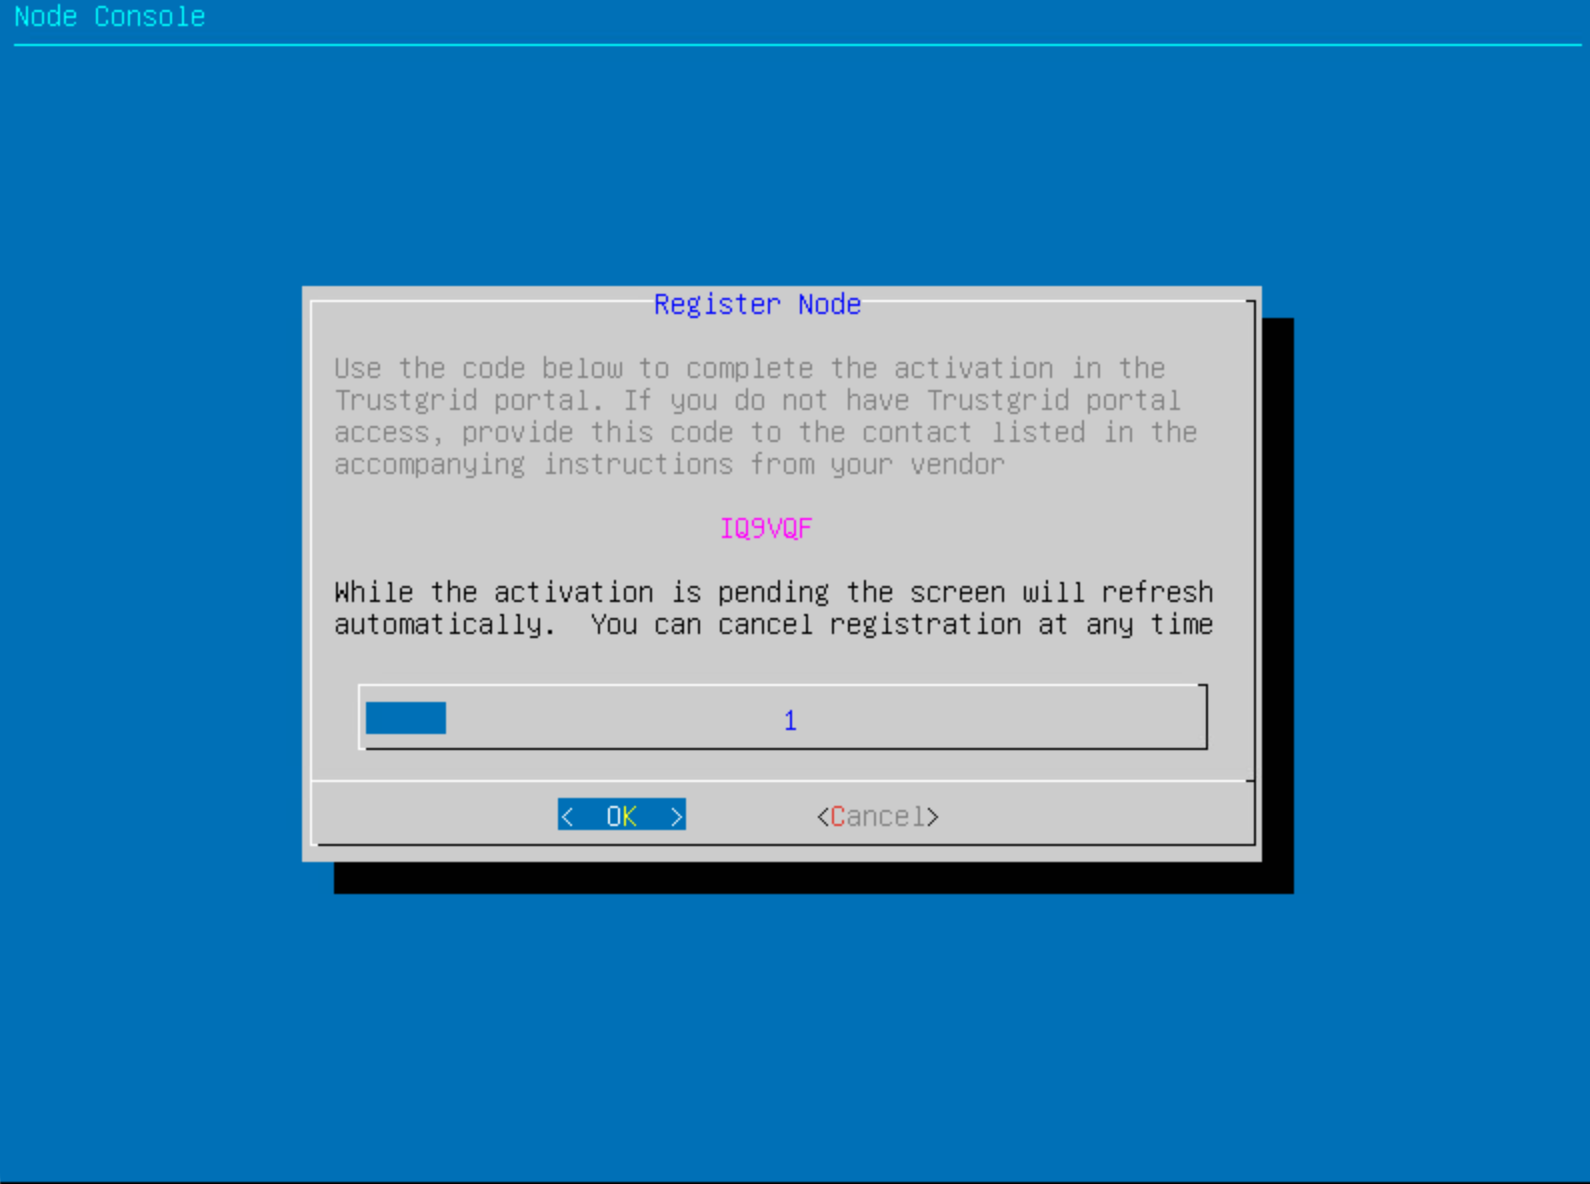
Example registration code
Portal Activation Process
Currently only users that have been granted access to this feature will see the action to activate a node.
- The user with access to the Trustgrid portal logs in and navigates to the Nodes page.
- Select the Activate Node action and enter the activation code generated by the Trustgrid console.

Nodes table Activate button - Enter the activation code from the Trustgrid console and click Find.
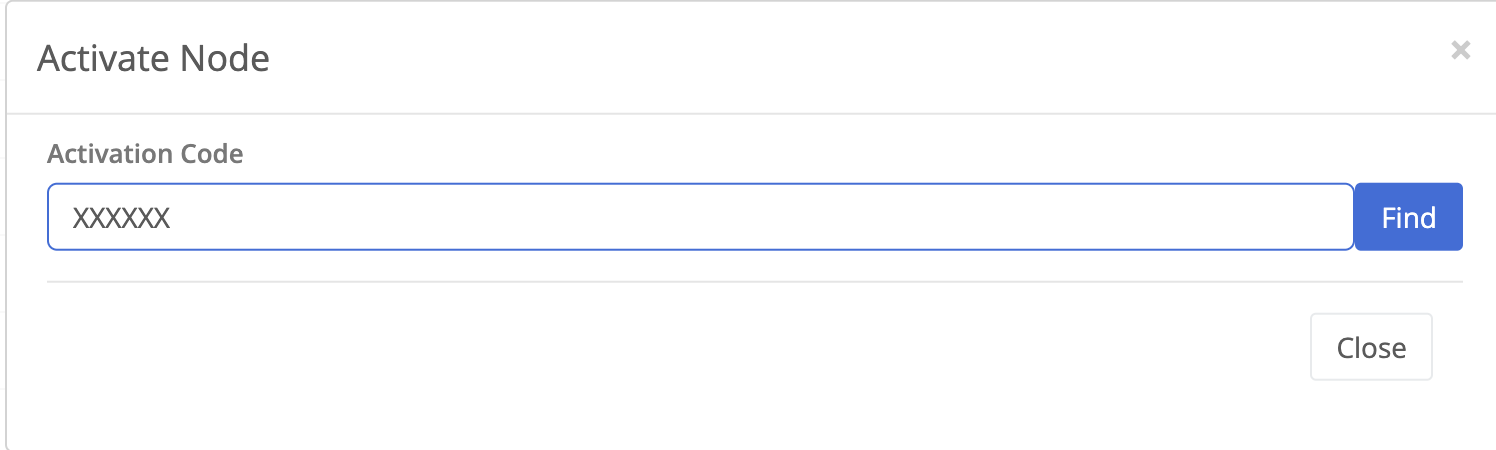
Entering the Activate Code - Enter a name for the node and click License Node.

Node information and prompt for name - The portal will display a message indicating the node has been activated.

Activation notice - The node will complete the registration process and reboot. The node will then be available for use and configuration.
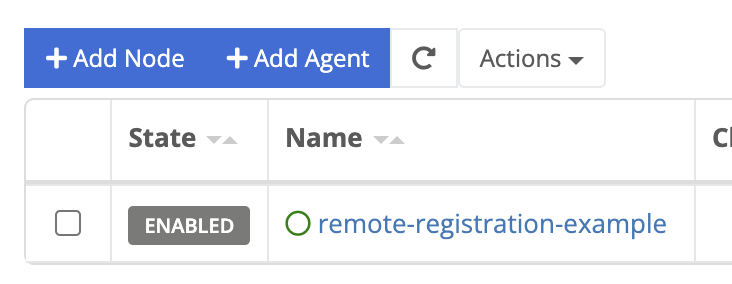
Registered node listed in Nodes table 
Console view after the registered nodes has rebooted.
Deregistering a Node
In rare circumstances a node may need to be deregistered which will remove the link between it and the account it was registered with. This will not remove the node from the Trustgrid control plane but communication with both the Trustgrid control plane and any data plane gateways will be severed. This is a one-way process and the node will need to be re-registered with the Trustgrid control plane to re-establish communication.
Deregistration Process
- Gain console access
- Login as tgadmin
- Select the Deregister Node action from the main menu.

Deregister Menu - When prompted confirm you wish to deregister the node.

Deregister Confirmation - You will then be prompted to enter
DEREGISTERto confirm.
Second deregister Confirmation - The node will then:
- If the node is currently connected to the Trustgrid control plane it will send a “Deregister” event type and disconnect from the control plane and any data plane gateways.

Deregister event - Remove it’s local certificates and reset it self to be ready to re-register.
- If the node is currently connected to the Trustgrid control plane it will send a “Deregister” event type and disconnect from the control plane and any data plane gateways.
Pre-registration Utilities
Before the node is registered there are a number of utilities available to assist with configuration and troubleshooting.
Network Configuration Utility
This utility is useful for switching the node to use a static IP or back to DHCP. T
- Select Network Configuration option
- If prompted, Select the WAN interface. This is typically the first option listed.

- Select the IP allocation method.

Option to select DHCP or Static IP - DHCP - this will automatically reconfigure the interface for DHCP.
- Static IP - this will open the dialog below. Enter the desired config and click OK to apply.
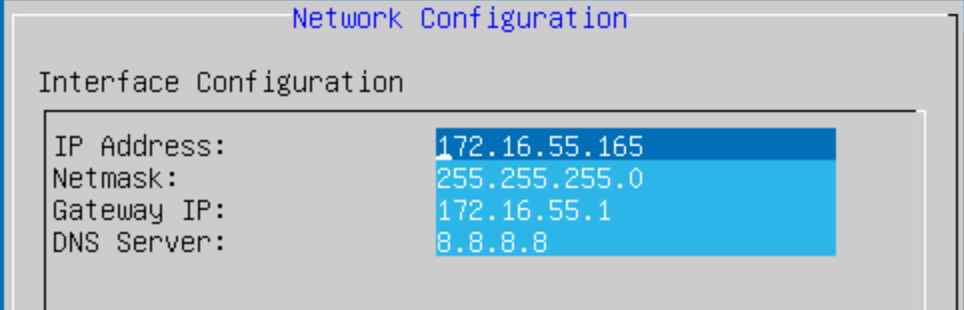
Static IP configuration prompt
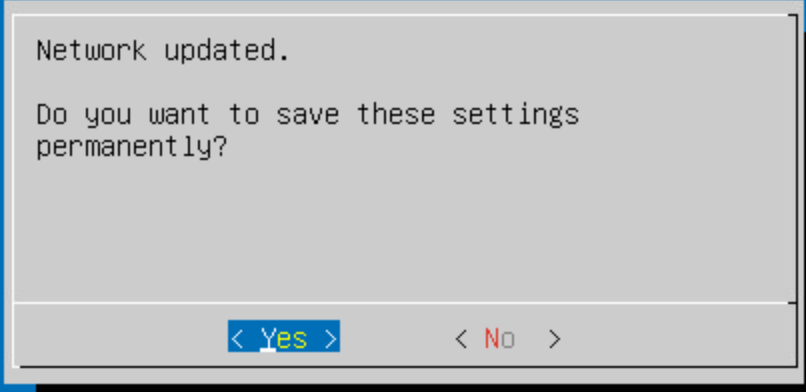
- You will then be prompted to confirm if you want to permanently save the configuration.
Network Tools Shell
This is the same as the Troubleshooting - Network Tools Shell
Test Network Access
This will attempt to confirm required access is in place to successfully connect to the Trustgrid Control Plane.

Log Shell
This will open a shell in the Trustgrid log directory. This will be empty unless a failed registration has occurred. Work with Trustgrid support to troubleshoot why registration failed.
Upgrade Node
This is the same as the Troubleshooting - Force Upgrade
Advanced Registration Settings
This can override the default settings included in the image. This should only be used in consultation with Trustgrid Support.
Feedback
Was this page helpful?
Glad to hear it! Please tell us how we can improve.
Sorry to hear that. Please tell us how we can improve.