Site Failover
4 minute read
The below processes should be used to move traffic between sites in event of a complete site down scenario. This is handled by the Virtual Network Route Table.
Manual Failover
When a customer has selected manual failover, a portal user will need to adjust the destination of all routes currently pointed at the failed site.
Failing Over
There will usually be routes for the nodes’ Virtual Management IP. These should not be changed in this process.
In the portal, navigate to Domain → Virtual Networks and then select the appropriate Virtual network.
Select the Routes panel from the left navigation bar.
Filter the route table either using the node/cluster names or network to be failed over (shown below).

a. If there is more than one network that needs to be routed to the secondary site using node/cluster names to filter is more efficient
- Clear the destination field and start typing the name of the secondary site node/cluster. Select the appropriate node/cluster from the list.
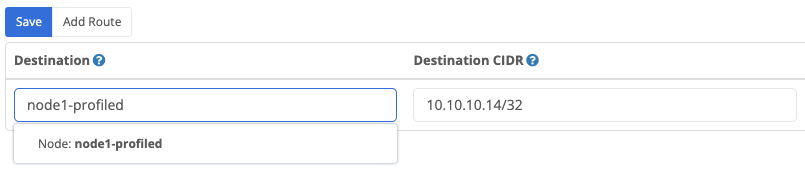
Click Save. Then select Review Changes.
You should see a modified route for each network you adjusted showing the previous and current destination. If everything looks correct click Apply Changes.
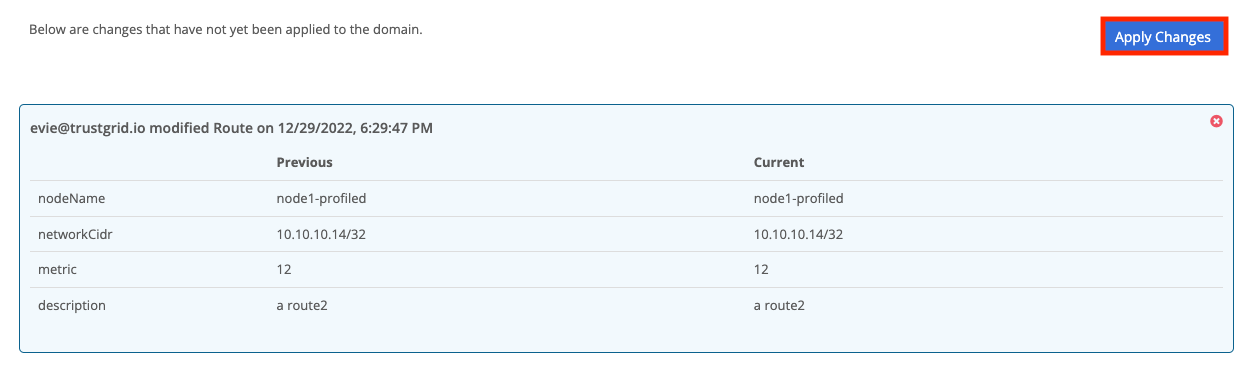
- It may take 1-2 minutes for nodes to pull down the updated routing table. Once that has completed any new flow or connection will automatically be sent to the new destination node.
Failing Back
To send traffic back to the primary site reverse the changes in the routing performed during the failover.
Automatic Failover
When a customer has selected automatic failover between sites there should be no intervention required if the primary site goes offline. The route table will be configured with multiple routes with different metrics. When determining where to send virtual traffic a node will select:
- The most specific route - meaning if there is a route for 192.168.100.1/32 and another for 192.168.100.0/24, the /32 route will be preferred
- With the lowest metric
- that is currently available - meaning this node has an active tunnel to the destination node/cluster
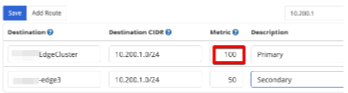
Below reflects a typical automatic failover configuration for a network
Forcing Failover or Prevent Auto-Failback
If it is necessary to move traffic to the secondary site without the primary site going offline follow the below process.
Also, if a failure of the primary site has occurred and you want to ensure traffic does not automatically return to that site if it comes online (e.g. it is unstable) you can follow the same process.
In the portal, navigate to Domain → Virtual Networks and then select the appropriate Virtual network.
Select Routes from the left navigation bar.
Filter the route table either using the node/cluster names or network to be failed over (shown below)
a. If there is more than one network that needs to be routed to the secondary site using node/cluster names to filter is more efficient
- Adjust the metric so that the primary site is a higher number than the secondary site. The maximum metric value is 200.
Click Save and navigate to Review Changes
You should see a change like below for each route adjusted. Click Apply Changes if all looks correct.
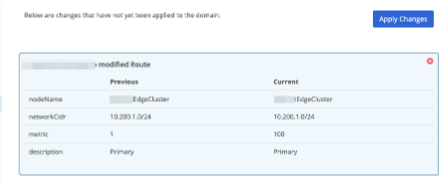
It may take 1-2 minutes for nodes to pull down the updated route table. At that point, they will route new flows/connections to the new destination.
Because the primary site is still online, you will need to restart the active node at that site to clear out any existing flows/connections.
a. If it’s a cluster, navigate to the cluster and then select the currently active node from the overview page. If a single node site, navigate directly to that node.
b. From the toolbar select Restart
c. Enter the node’s name and click confirm
Restore Traffic to Primary Site
To restore traffic to the primary site repeat the above steps but set the route for the primary site to have the lowest metric.
Feedback
Was this page helpful?
Glad to hear it! Please tell us how we can improve.
Sorry to hear that. Please tell us how we can improve.